Learn what email campaigns are and how to create, schedule, and send them in NevTan Engage.
Updated Jul 15, 2026Learn the basics of email campaigns in NevTan Engage — what they are, how the campaign wizard works, and how to send or schedule a one-time email to your audience. An email campaign is a one-time send to a target group of contacts. Use campaigns for newsletters, sale announcements, product launches, and other promotional sends. You can send immediately or schedule a send for a later date and time.
| Email campaign | Automation (flow) | |
|---|---|---|
| Audience | Send to a list or segment you choose in advance | Sends automatically when a trigger or behavior occurs |
| Timing | You create and schedule (or send) manually | Runs every time the trigger fires |
| Where to find it | Campaigns → Email Campaigns (/campaigns) | Automations → Built-in Flows or Custom Flows |
| Example | Monthly newsletter to engaged subscribers | Welcome email sent immediately after signup |
The campaign wizard walks you through recipients, content, and send options.
In the left sidebar, go to Campaigns → Email Campaigns.
On the Campaigns page, click Create Campaign.
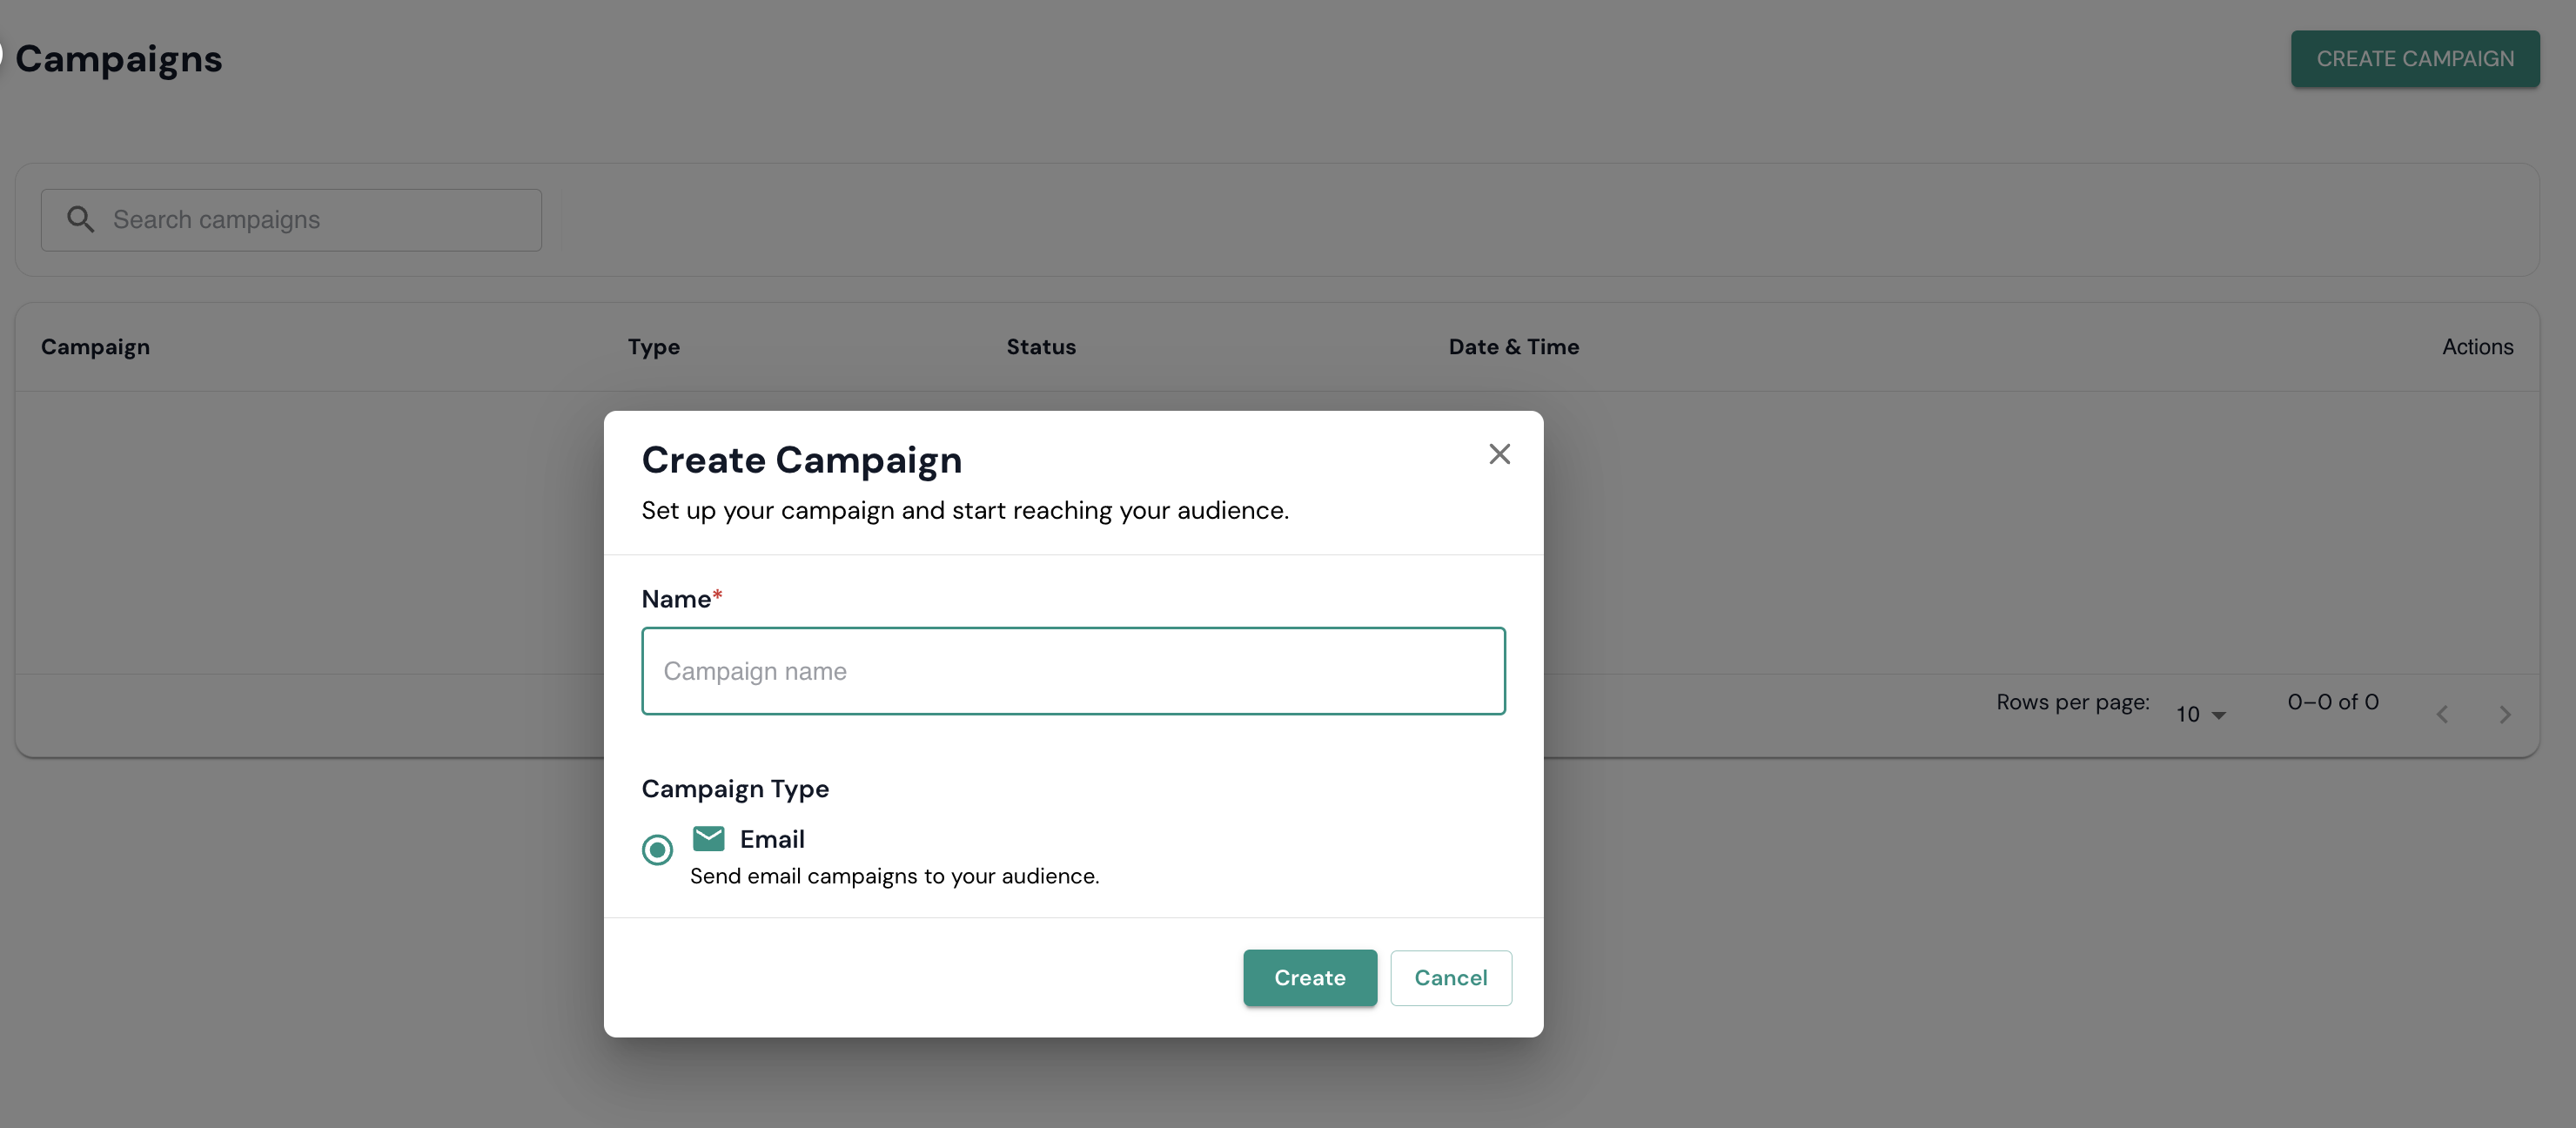 Enter a campaign name and choose Email as the campaign type.
In the dialog, Enter the campaign name.
In the dialog, confirm Email is selected as the campaign type.
Click Create to open the recipient step.
When you click Create Campaign, the setup dialog lets you define a required campaign name and confirm Email as the campaign type. After you click Create, you are taken to the Contacts (recipients) step. Draft campaigns stay in Draft status until you send or schedule them. If your workspace requires campaign approval, the campaign may need admin review before you can send.
The Contacts screen defines who receives your campaign. A campaign needs at least one recipient.
Under Send to, search and select one or more Lists or Audience Segments.
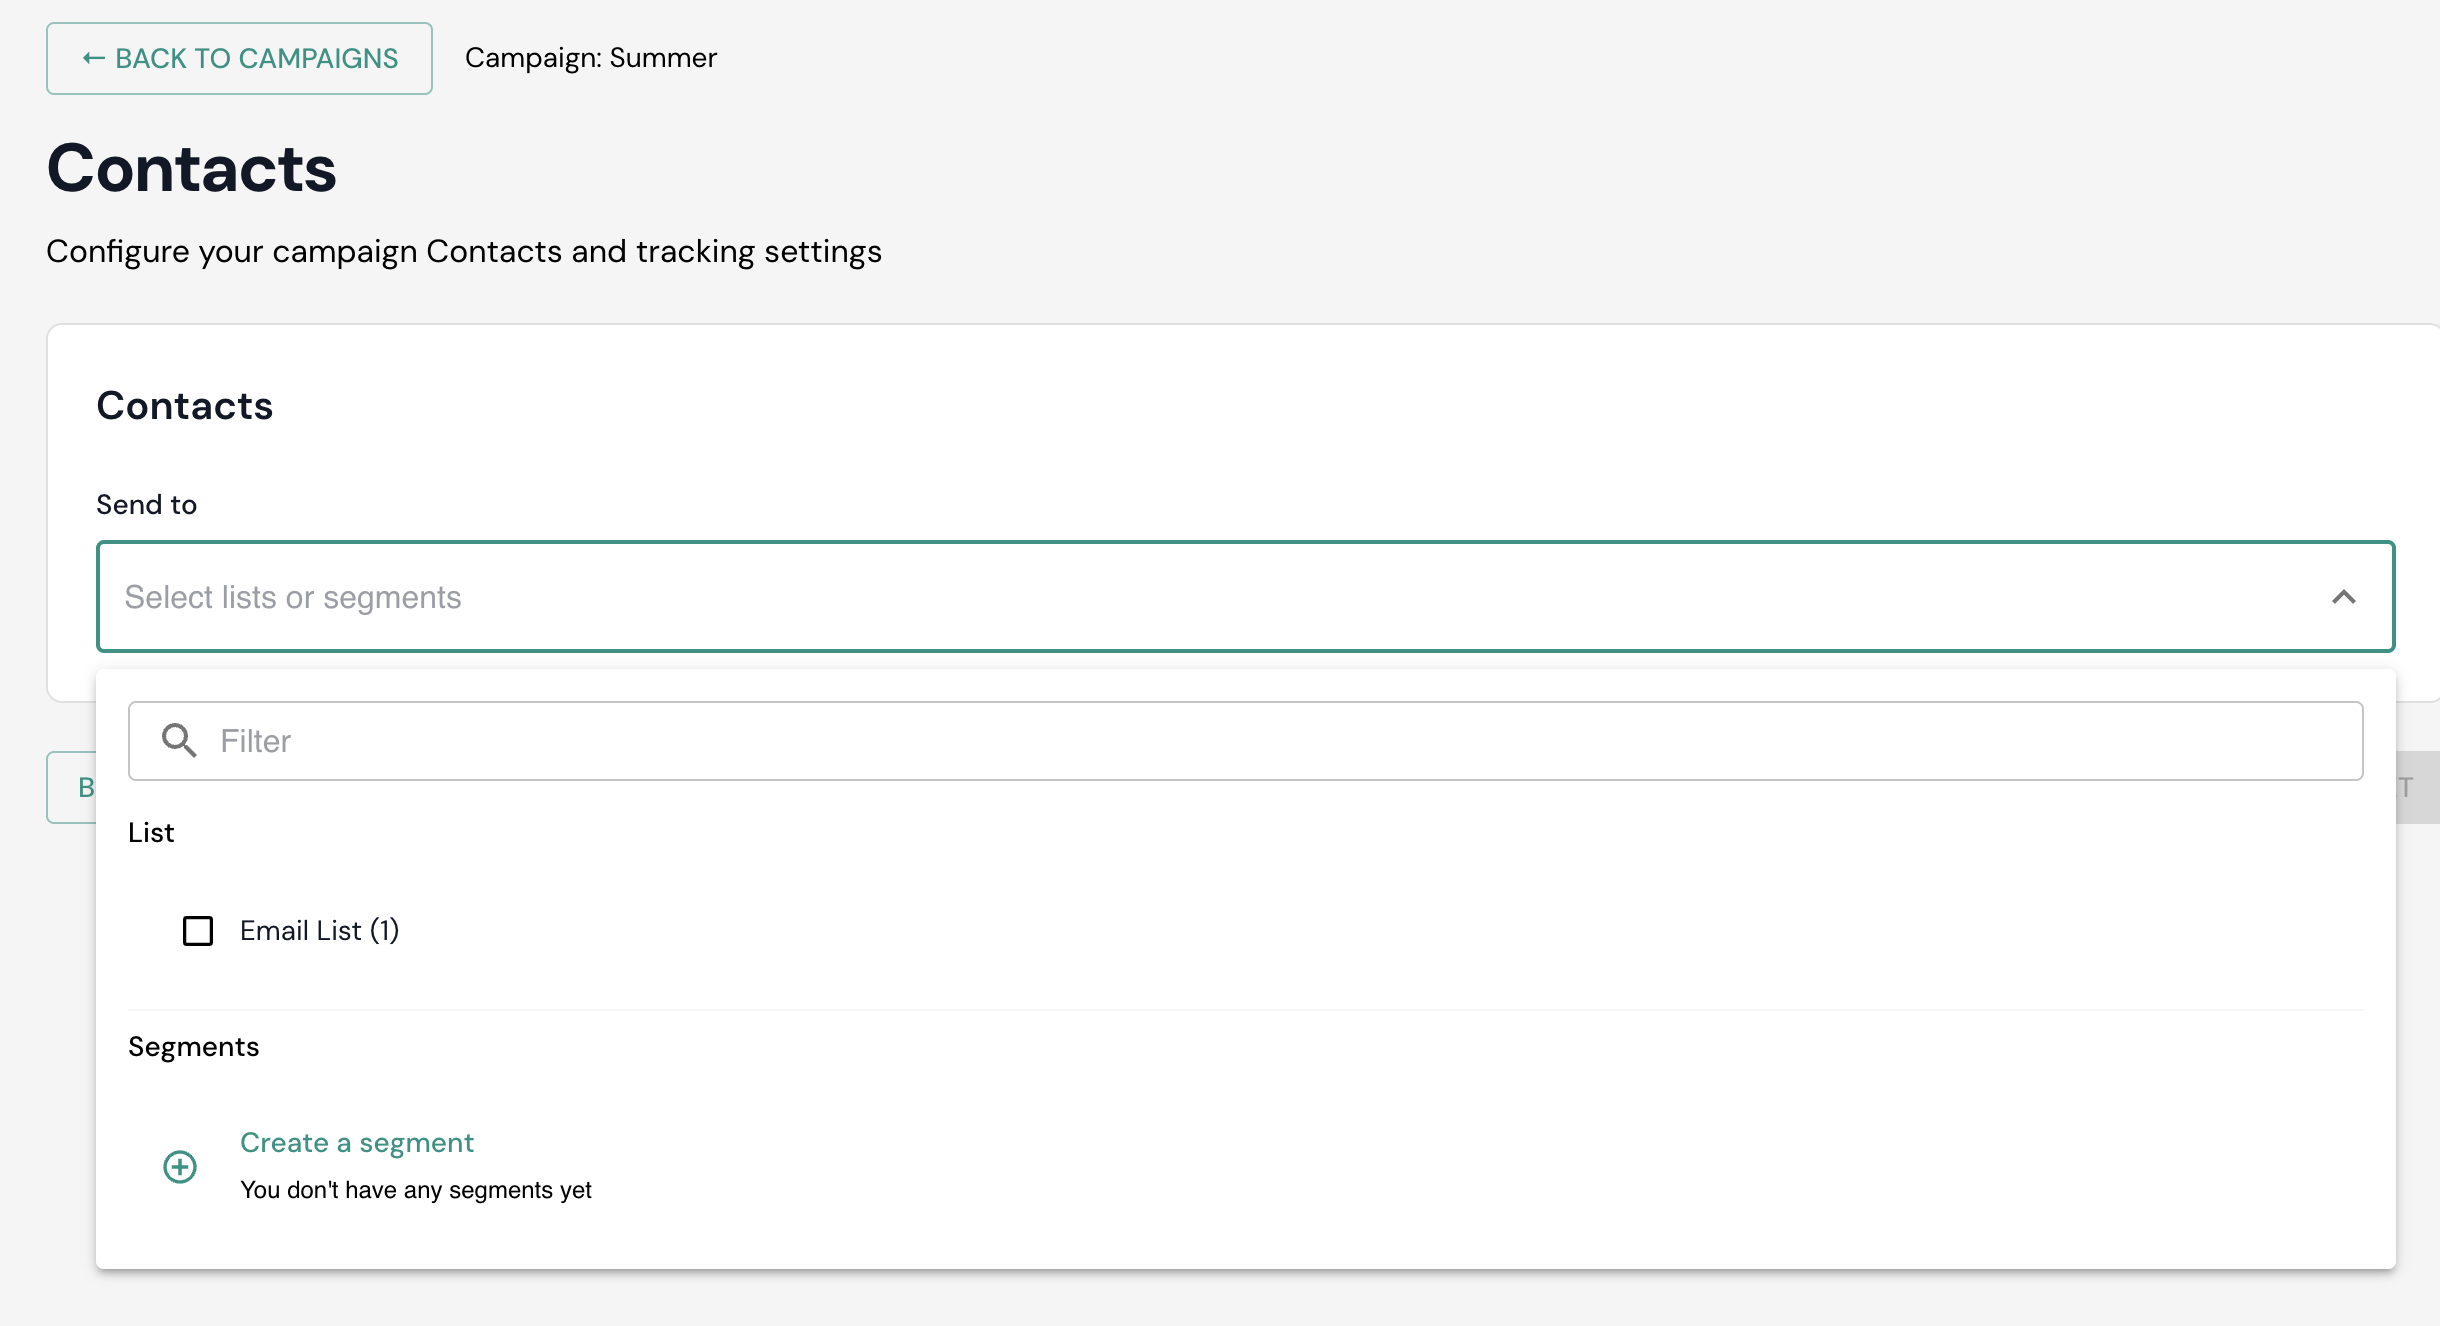 Choose lists or segments and review the recipient count.
Review the expected recipient count — duplicates and suppressed contacts are removed from the estimate.
Click Next to continue to the message step.
The **Message** screen has two panels: **Templates** on the left and **Email message** on the right. Choose or build your design on the left, then fill in send details on the right.
On the left, browse templates under Email Library (ready-made layouts provided by Engage) or Email Saved (templates you created and saved in Template Builder). Use Search to find a layout by name.
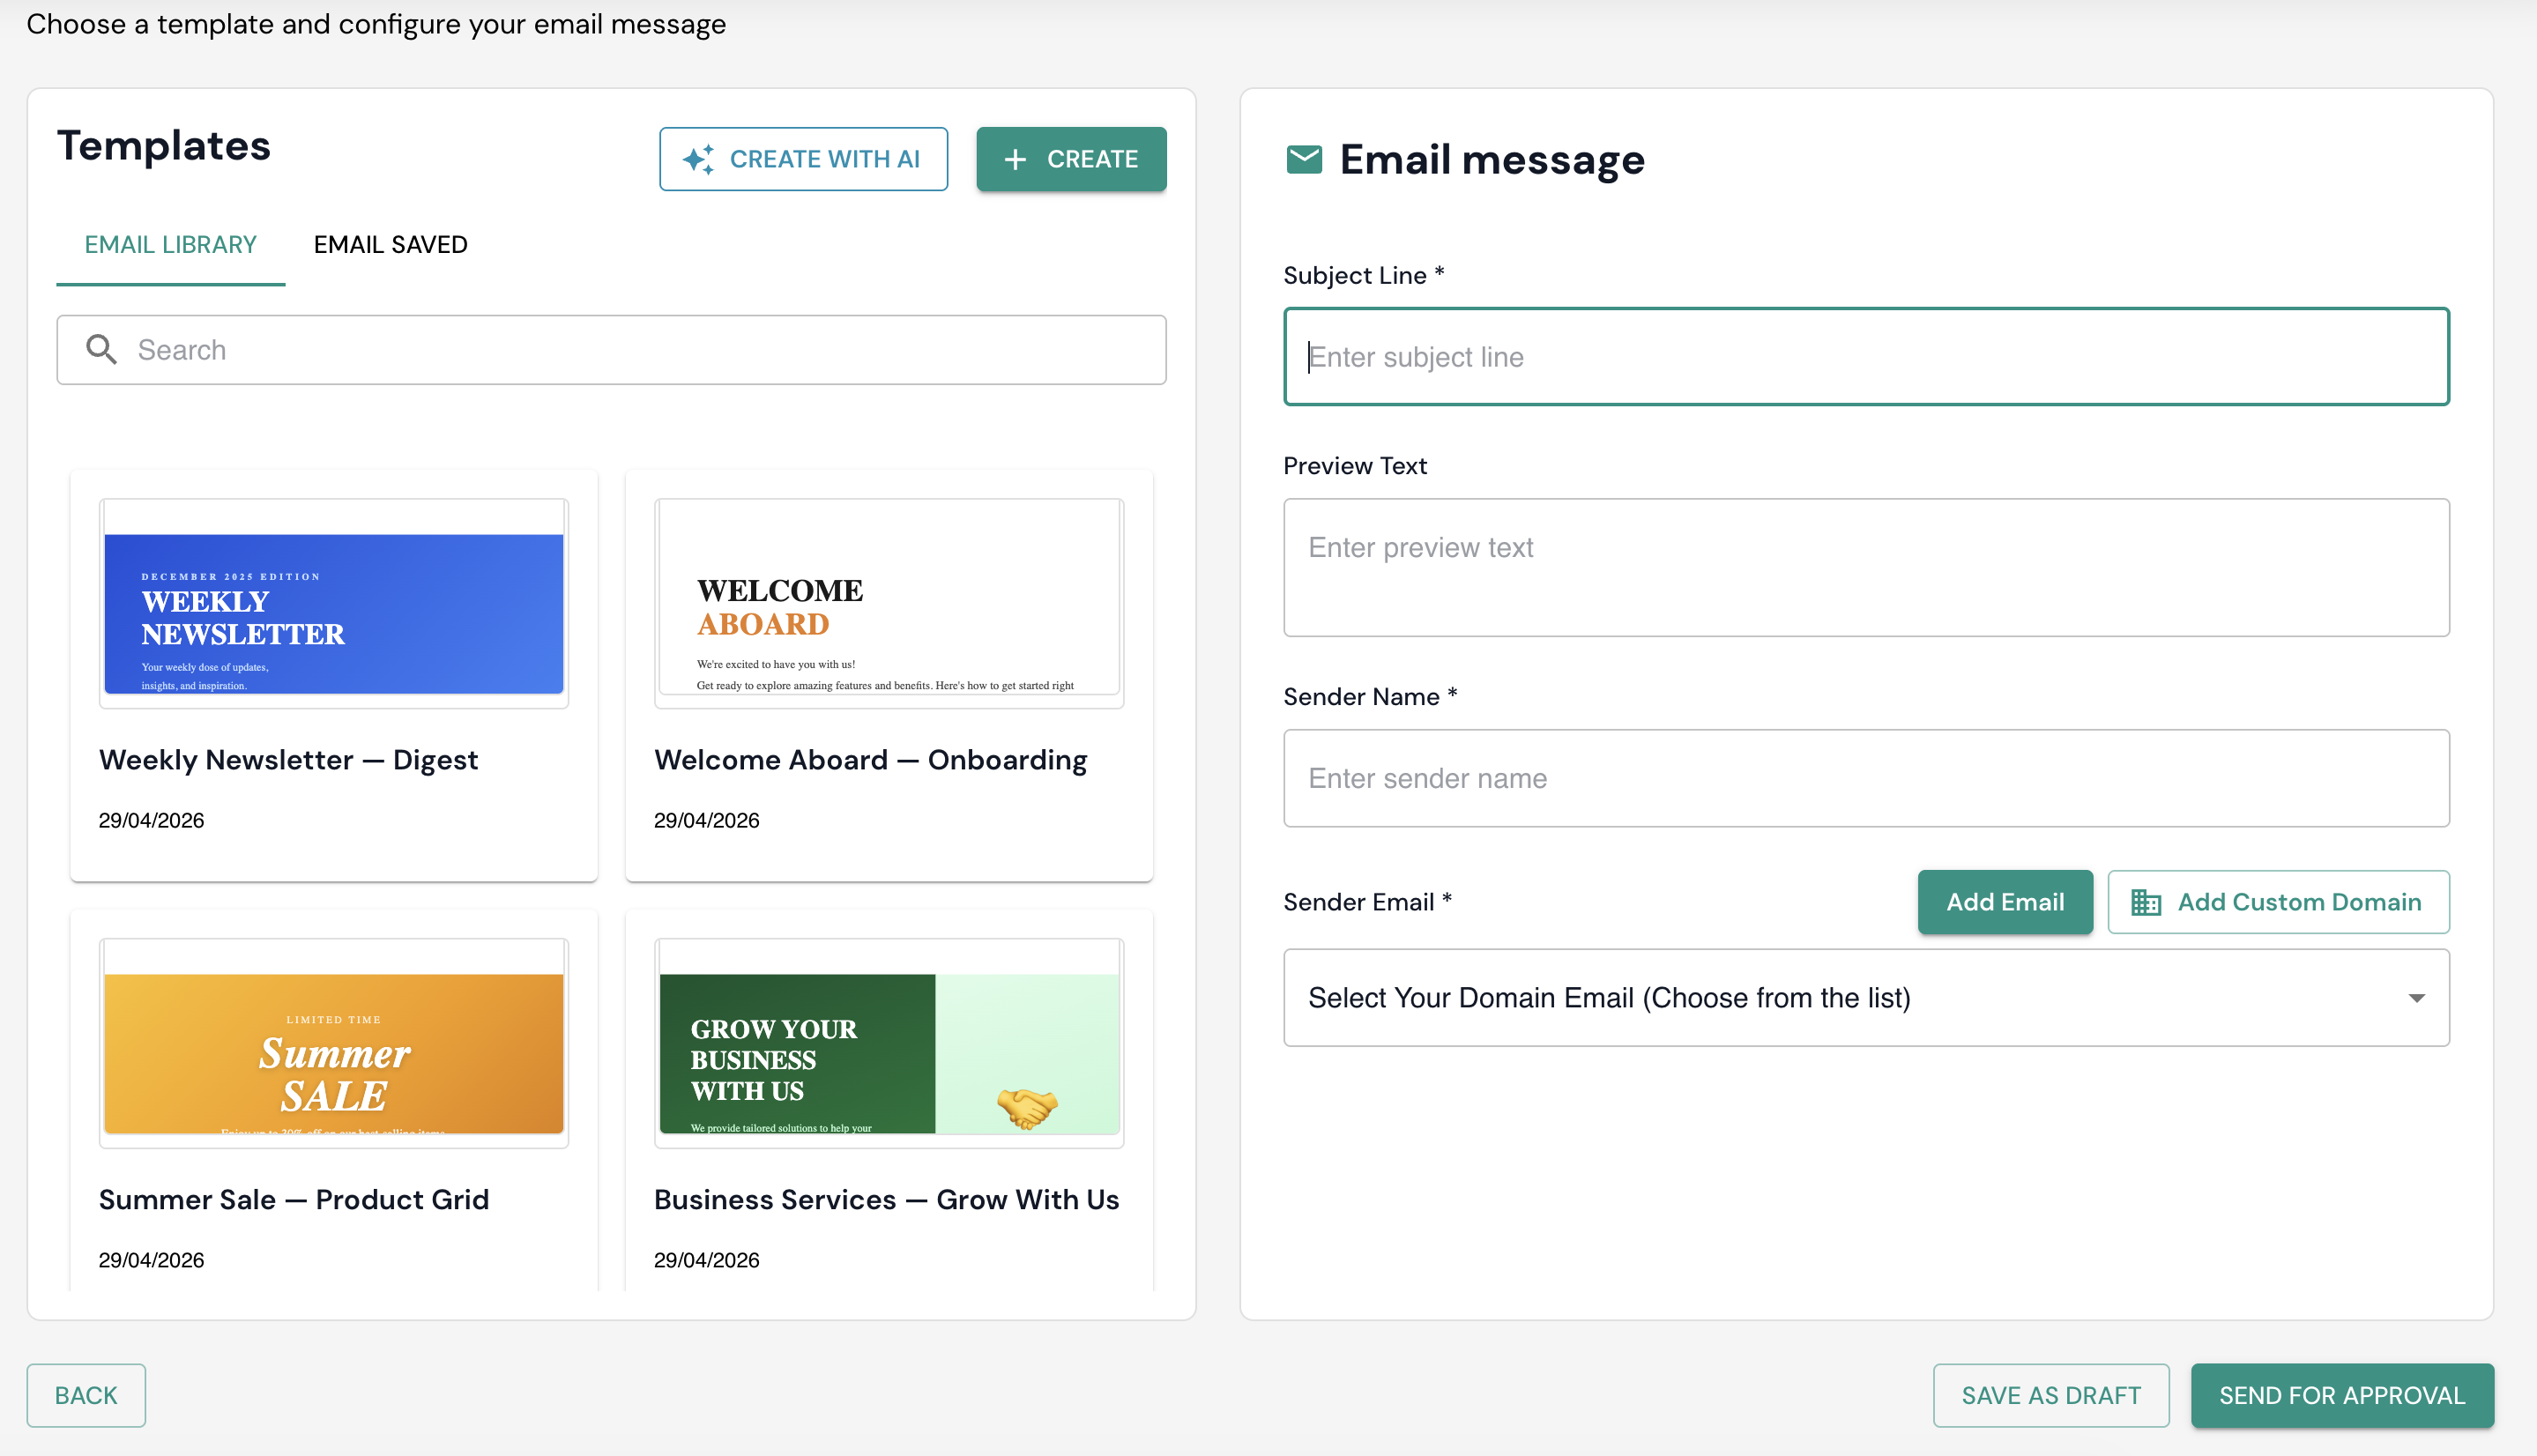 Message screen — Templates panel with Email Library and Email Saved tabs.
To start from scratch, click Create to open the drag-and-drop template editor and build your own layout. When finished, you return to the Message screen with your new design applied to the campaign.
To generate a design with AI, click Create with AI. This opens the template editor with the AI Assist panel so you can describe the email you want and refine the generated layout.
Click a template thumbnail to preview it, then choose Use template to apply it to your campaign. You can Edit template afterward to customize blocks, images, and copy in the editor.
On the right, complete the Email message section: Subject line (required), Preview text (optional), Sender name (required), and Sender email (required). Pick a verified address from the dropdown, or use Add Email / Manage Domains to connect a sending domain in Account settings.
Click Save as draft to keep your progress, or Send for approval if your workspace requires admin review. Once approved, use Proceed to Schedule/Send to deliver the campaign.
When your campaign is approved (or does not require approval), return to the **Campaigns** list to send or schedule it.
On the Campaigns page, find your campaign and click Send / Schedule in the Status column.
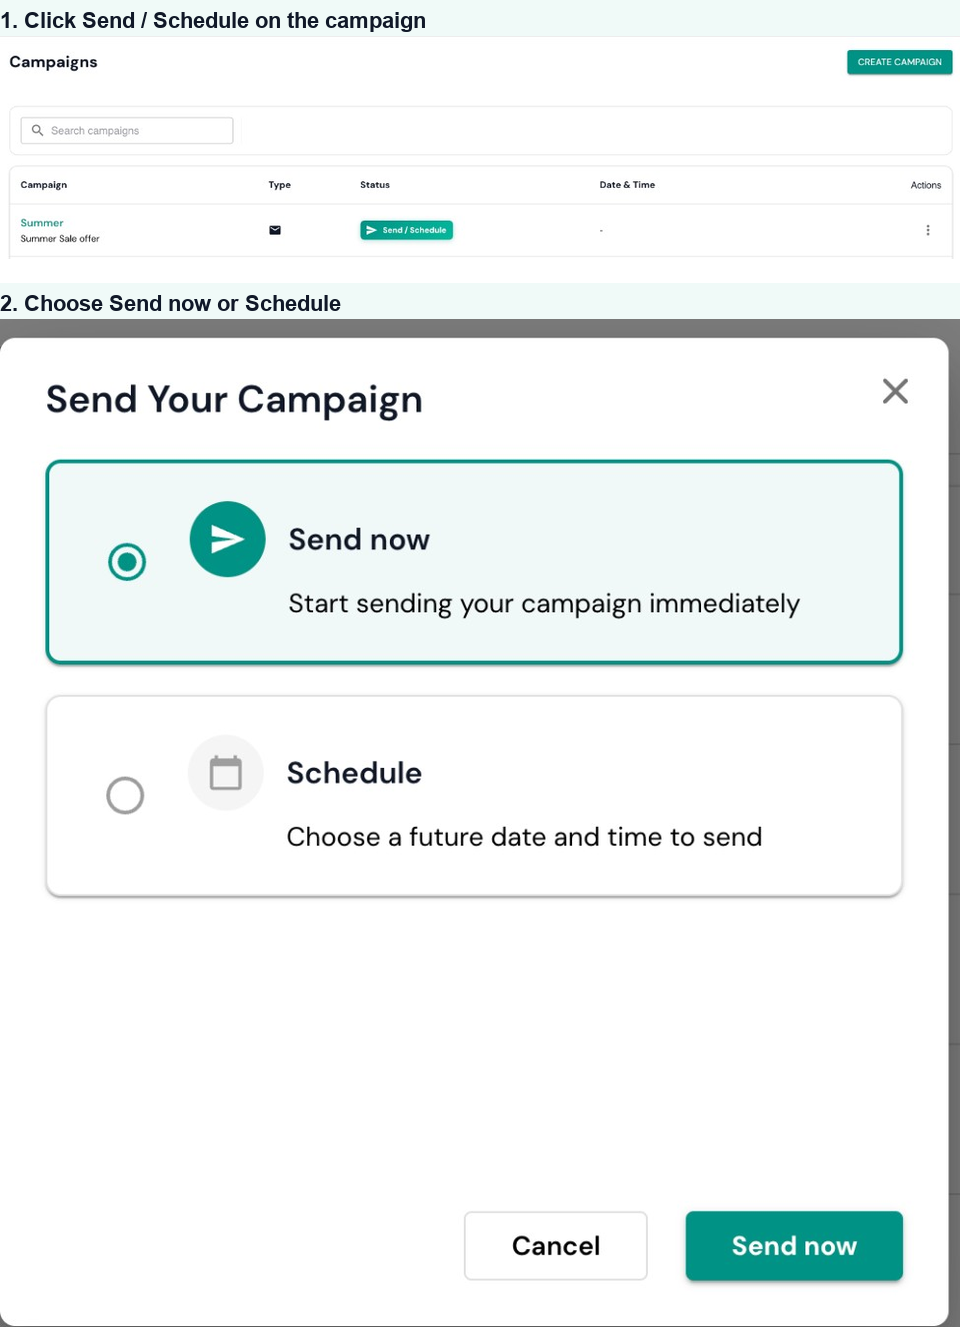 Step 1: Open Send / Schedule from the campaigns list. Step 2: Choose Send now or Schedule.
In the Send Your Campaign dialog, choose Send now to queue delivery immediately, or Schedule to pick a future date and time.
After your campaign sends, open it from the Campaigns list and go to the **Recipient Activity** tab. Filter by Delivered, Opened, Clicked, Bounced, and more — then review per-recipient timestamps or download a CSV export.
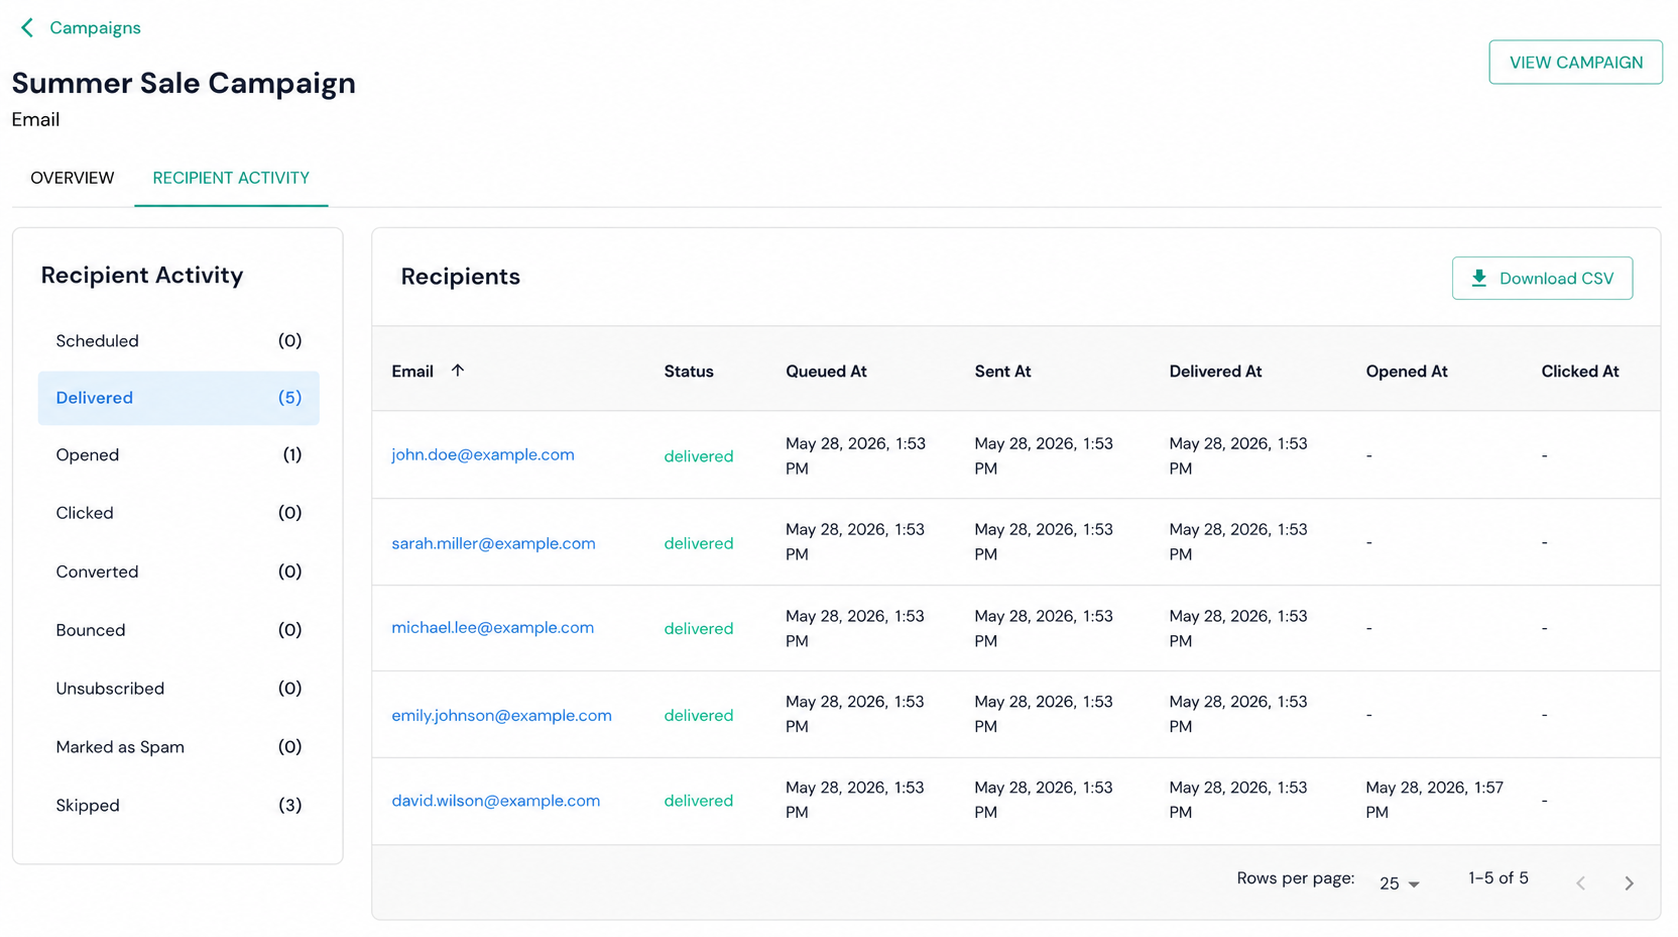 Recipient Activity tab — review delivered, opened, clicked, and bounced contacts.
Was this article helpful?